Overview
This article is part of a larger discussion on using webcam images for a live website. In particular, it discusses how to take a static image and add a title and date/time. All very useful if you can’t do this on the camera itself, or need to show other information.
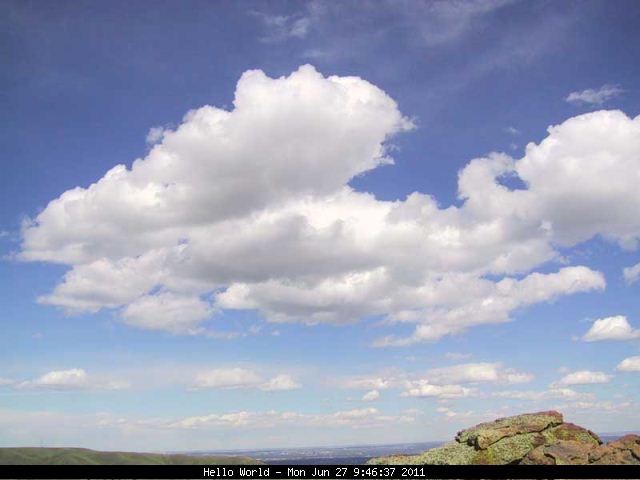
For this article, here’s what we assume we uploaded (this is reduced slightly, but is 640 by 480 pixels – click to see):
Adding the Date, Time and Title
This step will describe how to overlay text and graphics on your uploaded image using PHP (the PHP code is at the bottom of this article).
We could embed the filenames and dimensions, but here we make the PHP script parameter driven so we can change the inputs and not the script. For this script, we assume the following parameters from the command line:
- The filename of the original (static) image from the webcam – somewhere on the same file system
- The filename we will create
- The text we will add on the end of the footer
The following explains what the PHP code is doing, so read the code and text in parallel. Here we go …
Having given useful names to the input parameters, the next thing is to read the file and and work out how big it is.
After that, create a local “in memory” image, then create some local colours to use. Note these are all “GD” graphics functions, understood in PHP if your system has GD (or ImageMagik).
Right, we now have a copy of the image and some colours. Next we find out the date and time of “right now” as a string, and then concatenate the title message to that. We are assuming that we are using an image of 640 by 480 pixels (the script could be made more clever to be flexible – have a go if you like). After that we put a black band at the bottom of the image (a box).
Then we can actually write the text on top of the band using a function to centre the text (this could be done manually, but by using a function, if the text changes, it is still in the centre).
Once the text is on the footer, write the file out as the target JPEG file. Easy.
But before we finish, lets take a look at the function imagecenteredtext. This function has the location the text has to go (X and Y coordinates), the text to print, the size of the text and the colour to use. In simple terms it works out the current font in use, works out the number of pixels long that will be, divides it by two and then goes leftwards that number of pixels before printing it put on the img global (which is the internal copy of the image we are using).
And we are done. Note that this script assumes you have the GD image library installed and working properly. To use the full script below, copy and paste into a file, then get and image that is 640 by 480 pixels. Lastly use this at the command line:
php.php 'Hello World'
And you should get something like this:
Other things of note:
- The strip panel can be any colour you like – black works here because the source is light coloured. Select a different RGB colour value if you like.
- The strip can go elsewhere – we have used 0,465 and 640,478 which is left hand edge and up a bit from the bottom and right hand edge and nearly at the bottom (of 640 by 480 pixels).
- The text doesn’t have to be white. Again, chose a different RGB value or just use one of those listed in the code below.
- The date and time are when the image was processed is discovered on the image using the filemtime PHP function on the source image when we create the text message. Hence this is when the image was uploaded (which is important if you need to know when the image was created by the webcam). If it stops, the date/time will remain the same, which means the webcam is not uploading if the time shown is a long time ago.
- We have a few print statements to help us if debugging – this doesn’t affect the output.


Pingback: PHP: Overlay Text on a Webcam Image | Stratus